Beginner's Guide to DIY Nail Art
Beginner's Guide to DIY Nail Art
Discover the joy of creating stunning nail designs at home with our comprehensive guide. Perfect for those looking to enhance their nail care routine or try a new hobby, this article will walk you through the basics of nail art and provide step-by-step tutorials for easy nail designs.

With a friendly tone and easy-to-follow instructions, you'll be able to create beautiful nail art designs that will make you feel confident and creative. Whether you're a novice or just looking for new ideas, this guide is designed to help you get started with DIY nail art.
Key Takeaways
- Learn the basics of nail art and essential tools needed
- Discover easy nail designs for beginners
- Follow step-by-step tutorials for stunning nail art
- Enhance your nail care routine with creative designs
- Explore new hobby ideas with DIY nail art
Getting Started with DIY Nail Art
Embarking on the journey of DIY nail art can be both exciting and intimidating for beginners. With the right guidance, however, anyone can unlock their creative potential and achieve salon-quality nail designs at home.
Why DIY Nail Art Is Worth Learning
Learning DIY nail art techniques is not only a fun hobby, but it also offers several practical benefits. By mastering DIY nail art techniques, you can save money on frequent salon visits and have complete control over your nail designs. Additionally, creating your own nail art can be a great way to express your personality and style.
- Save money by reducing salon visits
- Have control over your nail designs and creativity
- Express your personality through unique nail art
Setting Realistic Expectations for Beginners
As a beginner, it's essential to set realistic expectations when starting out with nail art tutorials. Understand that achieving perfection takes time and practice. Start with simple designs and gradually move on to more complex patterns as your skills improve. Remember, the key to mastering beginner nail art is patience and consistent practice.
Some tips for setting realistic expectations include:
- Start with simple designs and gradually increase complexity
- Practice regularly to improve your skills
- Be patient with yourself and don't be discouraged by initial mistakes
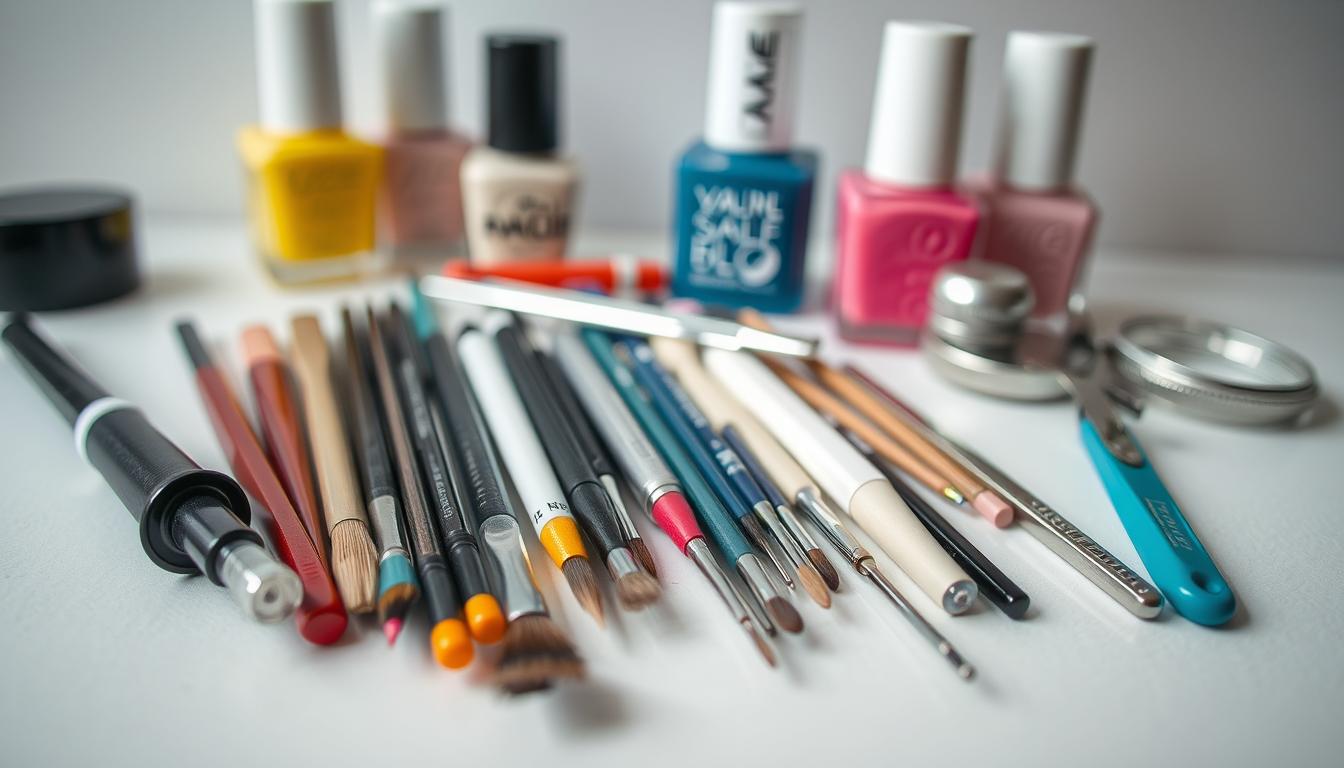
Essential Tools and Supplies for Nail Art
Creating stunning nail art designs requires the right nail art tools and supplies. To get started, you'll need to invest in some basic supplies that will help you achieve professional-looking results.

Basic Tools Every Beginner Needs
As a beginner, it's essential to start with the basics. Here are some must-have nail art supplies:
- Nail polish in various colors
- Nail brushes (various sizes)
- Dotting tools
- Nail art sponges
- Nail cleanser
These tools will help you create a variety of designs, from simple to complex. For instance, dotting tools are perfect for creating polka dots, while nail art sponges can help you achieve gradient effects.
Budget-Friendly Starter Kit Recommendations
If you're just starting out, consider investing in a starter kit that includes the basic tools and supplies. Here are some budget-friendly options:
- Look for kits that include nail polish, brushes, and dotting tools.
- Check online reviews to find kits that are highly rated by beginners.
- Consider kits that offer a variety of colors and tools.
Optional Tools for Expanding Your Skills
Once you've mastered the basics, you can expand your skills with optional nail art tools. Some examples include:
- Nail stamping kits
- Striping brushes
- Nail art stickers and decals
These tools will help you take your nail art to the next level, allowing you to create more intricate and complex designs.
Preparing Your Nails for Art
A well-prepared nail is the foundation of a beautiful nail art design. To ensure your nail art looks its best, it's essential to start with clean and shaped nails.
Proper Nail Cleaning and Shaping
Begin by removing any old nail polish using a gentle nail polish remover. This step is crucial for nail cleaning and ensures a smooth surface for your art. Next, shape your nails to your desired shape, making sure to file in one direction to avoid damaging the nail.
Base Coat Application Techniques
Applying a base coat is a critical step that prevents staining and promotes adhesion of the nail polish. To apply a base coat effectively, use a steady hand and start at the center of your nail, gently moving the brush towards the tips. This technique helps in achieving an even coat.
Creating the Perfect Canvas
After applying the base coat, your nails are ready for art. A smooth base coat creates the perfect canvas for your nail art design. Ensure the base coat is completely dry before proceeding with your design to avoid smudges and smears.

Beginner's Guide to DIY Nail Art Techniques
Getting started with DIY nail art involves learning a few key techniques that can elevate your nail game. With these foundational skills, you'll be able to create a variety of beautiful designs that will make your nails stand out.
Dotting Techniques
Dotting techniques are a fundamental part of DIY nail art. To create dots, you'll need a dotting tool or a toothpick. Dip the tool into your chosen nail polish and gently dot the nail surface. Experiment with different dot sizes by using varying amounts of polish or adjusting the pressure applied.

Simple Striping Methods
Striping is another versatile technique in DIY nail art. You can use striping brushes or tape to create straight lines. For a more freehand approach, practice using your brush to paint smooth, even lines. Striping can add a touch of elegance or playfulness to your nail designs, depending on the color and pattern you choose.
Basic Gradient Effects
Creating gradient effects is a bit more challenging but still accessible for beginners. You'll need a makeup sponge and some nail polish. Apply a small amount of polish to the sponge and dab it onto your nail. Blend the colors by layering different shades on the sponge before applying it to your nail. This technique allows for a beautiful, multi-dimensional look.
By mastering these DIY nail art techniques, you'll be well on your way to creating stunning nail designs. Remember, practice makes perfect, so don't be discouraged if your first attempts don't turn out exactly as you hoped.
5 Easy Nail Art Designs for Beginners
Now that you're equipped with the basics, it's time to dive into some easy nail art designs perfect for beginners. These designs are not only simple to create but also stylish and versatile, making them perfect for various occasions.

Polka Dot Design
A classic and timeless look, the polka dot design is achieved using a dotting tool or a toothpick. Simply dip the tool in your chosen nail polish color and dot onto your nails. You can create a random pattern or a uniform design.
Tape Manicure
Tape manicure is a simple technique that involves using tape to create straight lines or patterns on your nails. Apply tape to your nail in the desired pattern, paint over it, and then remove the tape to reveal a crisp design.
Simple Floral Pattern
A simple floral pattern can add a touch of elegance to your nails. Use a small brush to paint simple flowers or use nail guides for a more precise look. You can also use nail stickers for a quicker application.
Minimalist Line Art
Minimalist line art involves creating simple lines or patterns on your nails using a nail brush or a striping tool. This design is perfect for those who prefer a subtle yet stylish look.
Ombre Effect
The ombre effect is a gradient technique that involves blending two or more colors on your nails. Use a makeup sponge to dab the polish onto your nails, creating a seamless transition between colors.
These easy nail art designs are perfect for beginners looking to enhance their nail care routine. With a little practice, you'll be able to create beautiful and stylish designs that are sure to impress.
- Easy to Create: These designs are simple and require minimal tools.
- Versatile: Perfect for various occasions, from casual to formal events.
- Customizable: You can experiment with different colors and patterns to suit your style.
Working with Nail Art Tools
Understanding how to use nail art tools effectively is key to creating beautiful nail designs. To take your nail art to the next level, it's essential to master the tools of the trade. In this section, we'll provide tips and tricks on how to use common nail art tools, including dotting tools, striping brushes, and nail stamping.
Mastering the Dotting Tool
The dotting tool is a versatile instrument used to create dots, circles, and other rounded shapes in nail art. To use it effectively, hold the tool at a 90-degree angle to your nail and gently press the tip into the polish to create a dot. Experiment with different sizes of dotting tools to achieve varying effects.
Using Striping Brushes Effectively
Striping brushes are designed for creating straight lines and stripes in nail art. To use them effectively, dip the brush in polish and wipe off any excess on the rim of the bottle to prevent drips. Hold the brush steady and move it in smooth, continuous strokes to achieve crisp, clean lines.
Nail Stamping for Beginners
Nail stamping is a technique used to transfer images onto the nails using special stamping plates and polish. To get started, apply a thick layer of stamping polish to the design on the stamping plate, scrape off the excess with a scraper, and then roll the stamp over the design to pick it up. Transfer the image to your nail by rolling the stamp onto the nail surface.
Using Nail Art Accessories
Nail art accessories can elevate your designs from simple to stunning. With a wide range of options available, you can add a personal touch to your nail art and make it stand out.

Working with Nail Stickers and Decals
Nail stickers and decals are a great way to add intricate designs to your nails without the complexity of painting them freehand. To apply nail stickers, start by cleaning and shaping your nails. Then, peel off the sticker and place it on your nail, smoothing out any air bubbles. For decals, apply a thin layer of top coat to the area where you'll be placing the decal, then gently slide the decal off its backing onto your nail.
Applying Rhinestones and Gems
Rhinestones and gems can add a touch of luxury to your nail art. To apply them, use a dotting tool or a small brush to place a small amount of nail glue on the back of the rhinestone. Then, carefully place the rhinestone onto your nail, holding it in place for a few seconds until the glue sets. Seal with a top coat to ensure they last longer.
Incorporating Glitter and Foils
Glitter and foils can add a dramatic effect to your nail art. To incorporate glitter, apply a glitter polish or a clear top coat mixed with loose glitter. For foils, use a special adhesive and apply the foil to the wet adhesive, smoothing it out gently. Seal with a top coat to prevent the foil from lifting off.
| Accessory | Application Tip | Finishing Touch |
|---|---|---|
| Nail Stickers | Apply on clean nails | Seal with top coat |
| Rhinestones | Use nail glue | Seal with top coat |
| Glitter | Mix with top coat or use glitter polish | Seal with top coat |
| Foils | Use special adhesive | Seal with top coat |
By incorporating these nail art accessories into your designs, you can create unique and eye-catching nail art that reflects your personality.
Troubleshooting Common Nail Art Problems
Mastering nail art involves more than just technique; it also requires knowing how to fix mistakes. Even experienced nail artists encounter issues like smudges, uneven application, and designs that haven't turned out as planned. In this section, we'll explore practical solutions to these common problems, helping you to achieve professional-looking results at home.
Fixing Smudges and Smears
Smudges and smears are among the most frustrating nail art mishaps. To prevent them, make sure your previous layer is completely dry before adding more details. If a smudge occurs, you can try gently correcting it with a small brush dipped in nail polish remover. For more stubborn smudges, it might be easier to start over or cover the area with a new layer of polish or a decorative element like a rhinestone.

Dealing with Uneven Application
Uneven application can ruin an otherwise great nail art design. To avoid this, use a high-quality base coat to create a smooth surface. If you notice unevenness, try using a thin layer of topcoat to even out the surface. For more severe cases, you might need to strip the nail and start again, paying closer attention to evenness as you apply the polish.
| Issue | Prevention | Fix |
|---|---|---|
| Smudges | Let layers dry completely | Correct with a small brush and nail polish remover |
| Uneven Application | Use a high-quality base coat | Apply a thin layer of topcoat to even out |
| Designs Gone Wrong | Practice on a nail wheel before applying to nails | Cover with a new layer or decorative element |
Salvaging Designs Gone Wrong
Sometimes, despite your best efforts, a nail art design just doesn't turn out as expected. Don't be discouraged; there are often ways to salvage it. You can cover up mistakes with additional decorative elements or try to incorporate the "mistake" into the design. For instance, an unintended smudge could become a creative element with the right embellishments.
"The greatest glory in living lies not in never falling, but in rising every time we fall." - Nelson Mandela
This quote encapsulates the spirit of nail art: it's not about never making mistakes, but about learning from them and moving forward. With practice and patience, you'll become more skilled at troubleshooting and creating beautiful nail art.
Maintaining Nail Health While Practicing Nail Art
As you explore the world of DIY nail art, it's crucial to prioritize the health of your nails. Practicing nail art can be a fun and creative outlet, but it's essential to maintain healthy nails to enjoy this hobby long-term.
Preventing Nail Damage from Products
One of the key aspects of maintaining nail health is preventing damage from nail art products. Choose products that are free from harsh chemicals like formaldehyde, toluene, and DBP (dibutyl phthalate). Opt for nail polishes labeled as "three-free" or "five-free" as they tend to be less damaging. Always use a base coat to protect your nails from staining and to create a barrier between your nail and the polish.
Strengthening Treatments Between Designs
Between nail art designs, it's beneficial to give your nails some extra care. Use a nail strengthening treatment or a nail hardener to fortify your nails. These products often contain ingredients like keratin, calcium, or vitamins that help to nourish and strengthen your nails. Additionally, keeping your nails moisturized with cuticle oil can prevent dryness and brittleness.
| Nail Care Tip | Benefit |
|---|---|
| Use a base coat | Prevents staining and damage |
| Choose "three-free" or "five-free" polishes | Avoids harsh chemicals |
| Apply nail strengthening treatments | Fortifies and nourishes nails |

Inspiration and Resources for Beginners
As a beginner, finding the right inspiration and resources is crucial for improving your DIY nail art skills. The internet is filled with talented nail artists sharing their work, techniques, and tutorials that can help you learn and grow.
Social Media Accounts to Follow
Following nail art enthusiasts and professionals on social media platforms like Instagram and Pinterest can be a great source of inspiration. Some popular nail artists to follow include @NailsInspiration and @thebeautyallure68. These YouTube accounts often feature step-by-step guides, product reviews, and the latest nail art trends.

Beginner-Friendly Tutorials and Courses
For those looking to improve their skills, there are numerous beginner-friendly tutorials and courses available online. Websites like YouTube and Udemy offer a wide range of DIY nail art tutorials, from basic to advanced levels. Some recommended courses include "Nail Art for Beginners" and "DIY Nail Art Essentials."
| Resource | Description | Level |
|---|---|---|
| YouTube Nail Tutorials | Step-by-step video guides | Beginner |
| Udemy Nail Courses | Comprehensive online courses | Beginner to Advanced |
| Nail Art Communities | Online forums for discussion | All Levels |
By leveraging these resources, beginners can find the inspiration and guidance needed to enhance their DIY nail art skills and stay updated with the latest trends.
Conclusion
Now that you've reached the end of our Beginner's Guide to DIY Nail Art, you're equipped with the knowledge to create stunning nail designs. Practicing DIY nail art is a journey, and it's normal for your early attempts to not turn out as expected. The key is to keep experimenting and having fun with different techniques and designs.
As you continue to hone your skills, remember to explore various resources, including social media accounts and beginner-friendly tutorials, to stay inspired. With consistent practice, you'll become more confident in your abilities and be able to tackle more complex designs. Your creativity and patience will be rewarded with beautiful, professional-looking nail art.
By following the steps outlined in this guide, you're well on your way to mastering DIY nail art. Enjoy the process, and don't be afraid to try new things – it's all part of the creative journey.


Comments
Post a Comment